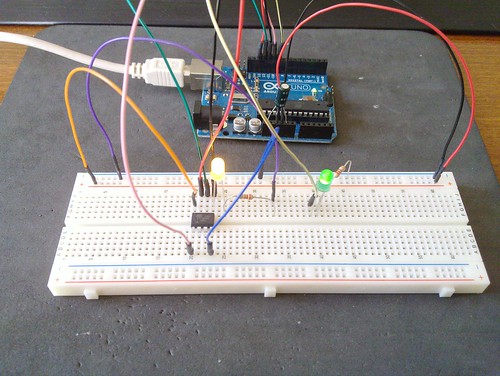
 I’ve just started to explore the Attiny 85 small Arduino’s brother.
To program the chip I’ve successfully followed the guide Programming an ATtiny w/ Arduino 1.0Â Â , just a few quick notes:
- you can use Arduino IDE 1.0, after uploading Attiny Arduino libs into your sketchbook/hardware folder
- in the Arduino IDE:Â load Arduino as ISP sketch from examples and change in the heartbeat function the delay(40) to delay(20), then upload the sketch on your Arduino board
- prepare the breadboard to flash the Attiny chip
- if you have an Arduino UNO rev.2 you now MUST put a 10uF capacitor between reset and gnd pins on the Arduino board (not sure about other boards)
- in the Arduino IDE: set the board to Attiny 85 (or to your chip type, if differs)
- in the Arduino IDE: set the clock of the Attiny to 8MHz (or whatever you choose), this must be done only the first time you use the chip
- in the Arduino IDE:open the blink sketch, change the pin from 13 to 0
- click the upload upload (if you get errors, see below)
Next step: how to use 3 PWM pins? It seems like it only has two.
If you get this error:
avrdude: stk500_initialize(): programmer not in sync, resp=0x15
avrdude: stk500_initialize(): programmer not in sync, resp=0x15
avrdude: please define PAGEL and BS2 signals in the configuration file for part ATtiny85
avrdude: stk500_program_enable(): protocol error, expect=0x14, resp=0x12
avrdude: initialization failed, rc=-1
         Double check connections and try again, or use -F to override
         this check.
just retry, usually the second time it goes through.
